Demand Supply Zone Indicator Access Guide
- Home
- Demand Supply Zone Indicator Access Guide
Thank you for your interest in the Demand Supply Zone Indicator. Follow the steps below to seamlessly access and optimize the indicator on TradingView.
Bookmark This Page
We recommend bookmarking or saving this URL for easy reference to settings and instructions once the indicator is active.
Once you receive the notification on TradingView that reads:
Follow these steps to access the indicator:
- Open TradingView
Visit the TradingView chart by clicking this link: Open TradingView Chart - Open the Indicators Window
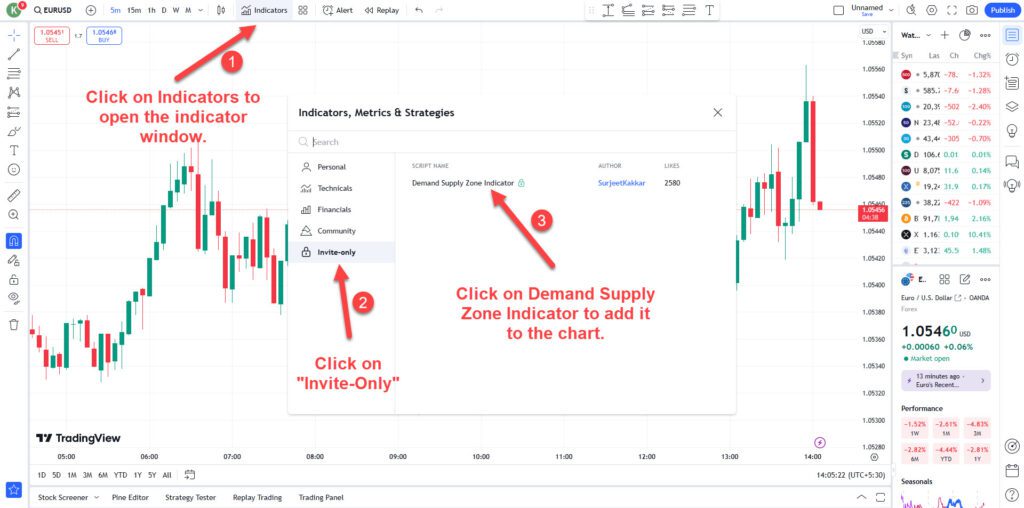
On the TradingView chart, click on the Indicators button located at the top of the chart. - Access the Invite-Only Indicators
In the indicator window, navigate to the left-hand column and click on Invite-Only Scripts. - Select the Demand Supply Zone Indicator
Locate the Demand Supply Zone Indicator from the list and click on it to add it to your chart.
Fixing Chart Compression Issue
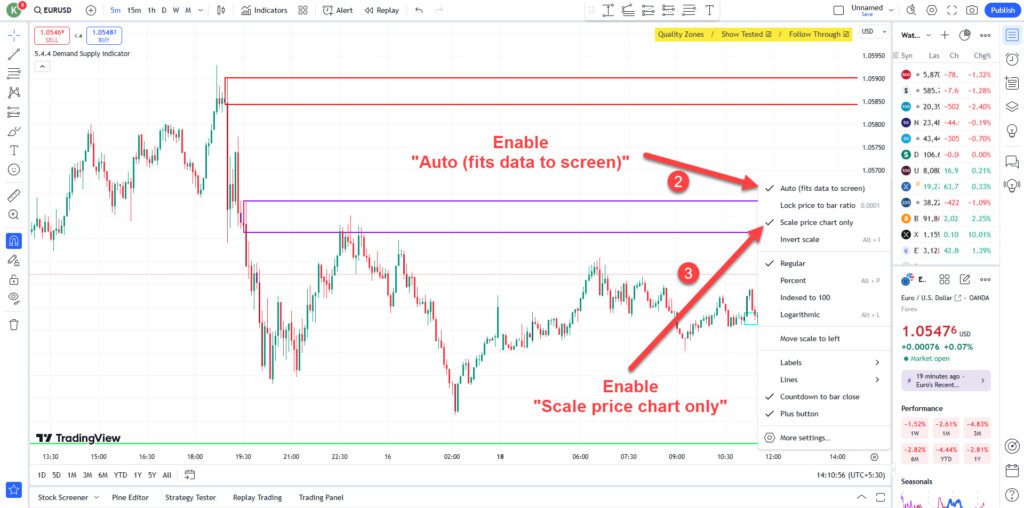
When the indicator is added, the chart may compress to display all the identified zones. Use the steps below to resolve this and ensure optimal chart display:
Open Chart Options
In the bottom-right corner of the TradingView chart, click on the Options icon (gear symbol).Enable Auto Fit Data
From the menu, enable the setting “Auto (fits data to screen)” to automatically adjust the chart view.Scale Price Chart Only
Enable “Scale price chart only” to ensure only the price data is scaled, and the chart displays correctly.
These adjustments will prevent unnecessary compression and ensure you have a clear view of the price action and demand/supply zones.
CLICK HERE for more information on the Demand Supply Zone Indicator.


